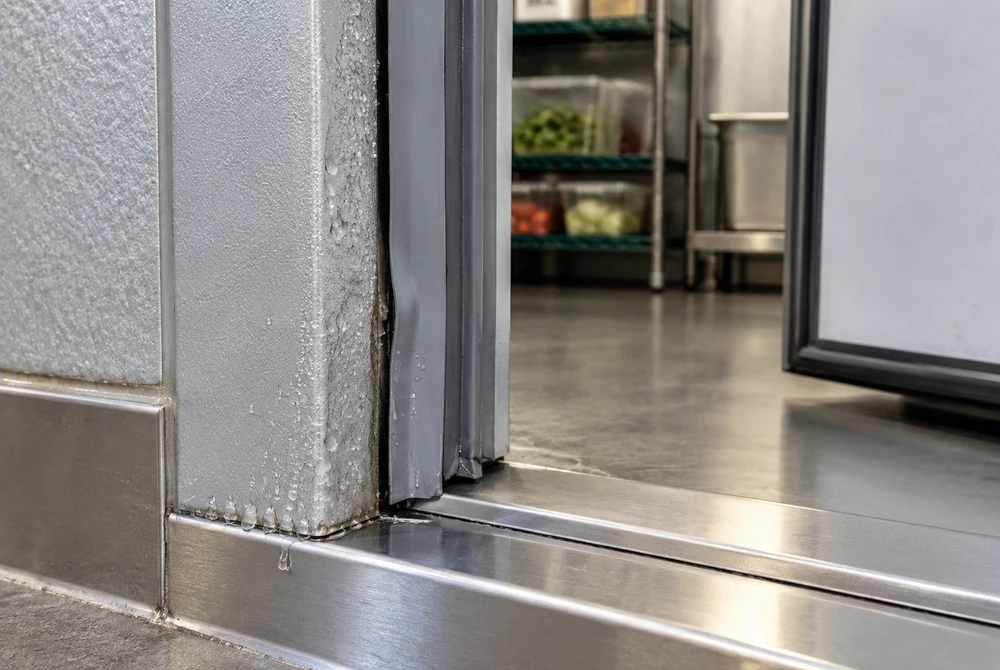
Water or ice around a walk-in cooler door does not automatically mean the gasket needs replacing, and it does not establish a refrigerant shortage. Start by locating the moisture: on the flexible seal, on the frame, at the threshold, on glass, between glass panes or elsewhere in the room. Then distinguish a closing or sealing fault from humid-air exposure, an installed frame-heater problem, airflow or a different moisture source.
A damaged or poorly contacting gasket can let humid air enter, but a good gasket cannot correct a sagging door, blocked closer or failed heater. The useful decision is which condition the evidence supports and which repair will address it. This guide helps commercial operators document the problem and arrange the right service without turning every wet doorway into an unnecessary refrigerant purchase.
Handle the operational risks before investigating the seal
A wet threshold creates a slip risk even if the refrigeration system is maintaining temperature. Restrict or manage the affected area according to site procedures, remove accessible water safely and record the condition. Keep emergency access and the door’s release mechanism usable. Do not block an exit, wedge a door shut or improvise a sealing method that prevents personnel from leaving the walk-in.
Check the room’s temperature records separately from the visible water. A functioning thermostat does not establish that all stored products are within their required limits. If storage conditions are questionable, follow the operation’s food-safety plan and applicable local requirements, involving the responsible manager. The decision about product disposition needs its own evidence; the presence or absence of door condensation alone cannot make it.
A door that will not close, ice that interferes with its operation, damaged electrical components or recurring water near powered equipment requires prompt qualified attention. Operators can observe and report accessible conditions, but should not open heater wiring, bypass controls or chip ice off an energized assembly. Heavy doors, glass and ice introduce mechanical hazards in addition to the refrigeration issue.
Record what happened before cleaning removes the evidence. A photo showing the entire opening and a close view of the wet area can be more useful than a close-up of one torn corner alone. Include the date, room identity and whether the door was recently held open. Documentation should make the next service visit shorter, while immediate housekeeping keeps people safe.
Condensation follows surface temperature and surrounding moisture
Condensation occurs when a surface is cold enough relative to the dew point of the adjacent air. A doorway connects two different environments, and its frame, seal and threshold do not all have the same surface temperature. Moist outside air reaching a cold surface can therefore produce droplets even when the room’s control display looks normal. If the local surface is cold enough, that moisture can freeze.
This explains why a symptom may appear during heavy receiving traffic, humid weather, nearby washdown or a change in building ventilation. The exposure has changed even though the gasket has not suddenly failed. It also explains why a damaged seal can make the condition worse: the opening allows more moist air to reach cold surfaces. Both humidity and contact deserve attention.
Keep cooler and freezer observations distinct. Ice at a freezer doorway can involve a much colder surface and the freezer’s specific heater and pressure-management design. A medium-temperature cooler with droplets presents a different operating context. Do not apply a freezer repair instruction to an unidentified cooler simply because both rooms have insulated doors and flexible seals.
A dew-point measurement can help a qualified technician relate ambient temperature and humidity to the surface condition. It is evidence about condensation potential, not a substitute for checking the door. For an operator, noting when the symptom happens and what the surrounding space is doing is a practical first step. “Only after dishwashing starts” is more diagnostic than “door always seems wet.”
Map the moisture before selecting a repair
Identify the first area that becomes wet, not just where water eventually collects. Water can run down a frame and accumulate at the bottom, making the threshold appear to be the source. A ceiling drip can land beside a sound gasket. If possible, observe the progression after safe cleanup under ordinary operating conditions, without deliberately holding the door open to create a larger problem.
Use a consistent location description: upper hinge corner, latch-side frame, bottom sweep, exterior glass surface or between panes. Indicate whether the water is inside or outside the room. The same words should appear in the photos, log and service request. This lets a technician compare repeated observations and choose which assembly to inspect first.
Scroll sideways to view all columns.
| Where moisture appears | Conditions worth investigating | Useful evidence for service |
|---|---|---|
| At a visibly split or distorted gasket area | Damaged material, contamination or inadequate contact | Close photograph and exact position with door closed |
| Along the frame with an apparently intact seal | Humidity exposure, alignment, thermal bridging or an installed heater issue | Frame location, traffic pattern and equipment model |
| At the threshold or lower edge | Sweep condition, door sag, drainage or water running from above | Full opening photograph and first wet location |
| On the exposed surface of glass | Ambient conditions, airflow and door-system design limits | Which surface is wet and nearby airflow changes |
| Between insulated glass panes | A glazing assembly issue rather than simple surface sweating | Persistent internal fogging and door identification |
| On a ceiling, wall joint or adjoining room surface | A different moisture pathway or panel/building condition | Wide photographs showing separation from the door seal |
Inspect the gasket as part of the complete closing assembly
An accessible visual inspection can identify tears, missing sections, hardened material, displaced corners and debris on the contact surface. Look at the entire perimeter. A single clean section does not establish that the opposite corner seals. Avoid stretching or pulling material out of its retainer merely to inspect it. Follow the manufacturer’s instructions for the specific seal design.
Check whether the door meets the frame evenly in normal closed operation. A gasket may look healthy while one corner barely contacts the frame. Conversely, a visibly worn area may still be only one contributor to the leak path. Observe whether the latch engages normally and whether the door closes without a cart, shelf, package or floor obstruction preventing its final travel.
Door geometry matters. A sagging leaf, worn hinge or distorted frame can produce a contact gap that a replacement seal alone will not solve. Operators should report uneven gaps or a change in closing behavior rather than attempt unapproved hinge adjustment. Door hardware carries significant weight, and a generic internet torque value or improvised shim can create a new safety or alignment problem.
If the equipment manual permits a contact check with a paper strip or another simple method, apply that method as described and record the location. Do not invent a universal pull force or treat such a check as a certified air-leak measurement. The important observation is a consistent difference around the same door, interpreted alongside its design and condition.
Clean correctly before condemning an otherwise sound seal
Residue on the gasket or mating surface can interfere with contact and conceal damage. Use the cleaning materials and method approved for the door and gasket. An aggressive solvent can damage flexible material, and abrasive tools can alter a contact surface. A cleaning product suitable for another piece of kitchen equipment is not automatically suitable for this seal.
Accessible cleaning should preserve the door’s fit and keep water away from electrical parts. Do not flood a heater frame, dismantle a retainer or remove a seal unless the authorized procedure calls for it. If residue cannot be removed safely with the approved method, document it and request service. Trying several chemicals in succession can make both the material condition and the original symptom harder to evaluate.
After cleaning, observe whether the door closes normally and whether moisture returns under comparable traffic and ambient conditions. An immediate dry appearance only proves the surface was dried. It does not demonstrate that the contact problem or condensation driver is resolved. A follow-up observation during the next relevant operating period is more informative.
Keep the cleaning record short but specific: approved product, area cleaned, obvious damage found and next observation time. If another shift later reports the same symptom, that record prevents the team from repeating an ineffective cleaning step indefinitely. It also helps distinguish a maintenance issue that responds to cleaning from a parts or building-condition issue that requires a different response.
Door traffic and building humidity can overwhelm a good seal
Observe the real operating pattern. A door left open while a delivery is sorted admits much more air than a promptly closed door. A closer that works during a quiet inspection may be defeated by carts or staff propping during busy periods. The gasket cannot seal an opening while the door is open, so replacement will not address that particular source of moisture.
Ask whether the surrounding area recently changed. New washdown practices, a dishwasher, ventilation changes or an open loading entrance can alter humidity near the walk-in. A symptom beginning after one of these changes deserves an environmental review as well as a door inspection. Document the timing rather than assuming the most visible rubber component caused it.
Practical operational changes can include staging deliveries before opening the walk-in, keeping the closing path clear and using the installed door hardware as intended. Any additional barrier or traffic solution should be selected for the actual room and site requirements. Do not add an improvised curtain that obstructs exits or interferes with the door’s safe operation.
Manufacturer environmental limits are model-specific. The Norlake walk-in manual, document 132617 discusses controlled surrounding conditions and notes that occasional droplets may occur during exceptionally high humidity. That context is useful, but it does not authorize dismissing recurring floor water or using its installation limits as universal values for every brand of walk-in.
Does the frame have a heater, and is it working as designed?
Some door systems use a heater in the frame or threshold to keep vulnerable surfaces warmer. Others have different designs. First identify whether the actual assembly includes a heater and what controls it. A cooler operator should not assume that every frame must feel warm, or that a cool section automatically proves a failed element.
In the covered Norlake design, the manual describes the heater’s role in preventing condensation around the opening and discusses moisture or freezing when it fails. It also requires safe electrical handling for service. This supports checking the installed assembly when perimeter moisture persists, rather than repeatedly replacing a gasket without evaluating a separate heating component.
Have a qualified technician compare the model’s wiring and controls with actual operation. Appropriate electrical testing, component access and isolation belong to that service work. Operators should provide symptom location and timing, not bypass switches, fit a larger heater or open wiring compartments. A repair must retain the designed electrical protection and approved parts.
Also consider why a working heater might be insufficient under changed surroundings. Extreme humidity, damaged insulation or abnormal airflow can alter the surface condition. The solution could involve the environment, assembly integrity or control behavior rather than a stronger replacement element. Diagnosis should establish the cause instead of escalating heater output by guesswork.
Glass-door sweating needs its own branch of the diagnosis
If the door is glazed, identify which glass surface carries the moisture. Exterior droplets, interior droplets and persistent fogging between panes are different observations. A perimeter gasket replacement may help an air-entry problem, but it will not repair a failed insulated glazing assembly. Photograph the pattern clearly before describing all three conditions as a leaking seal.
The Hussmann EcoVision medium-temperature door manual, revision J warns that cooler air directed onto its doors can contribute to condensation. It also specifies operating conditions for that product. These instructions support investigating airflow and environment on the covered system; they should not be generalized into one airflow rule for every solid walk-in door.
A changed evaporator air pattern, moved stock or an added fan can affect a glass surface. Report the change to the service provider without blocking required refrigeration airflow as an improvised fix. The technician needs to assess the door and refrigeration arrangement together. Covering the symptom with another sheet of material can introduce cleaning, visibility or performance problems.
Glazing replacement and heavy-door handling require the appropriate service procedure and protective equipment. Operators should not remove panes, drill the door or apply a heat gun to chase away internal fogging. A temporary clear appearance is not proof that the glazing assembly is sound. The part identification and repair need to match the actual installed door system.

Why a new gasket can leave the doorway wet
A repeat symptom after replacement is useful evidence. It may indicate that the original diagnosis was incomplete, that the new part is incompatible or incorrectly seated, or that a second condition remains. Ask which of those possibilities was checked before ordering another gasket. Repeating the same part replacement without a revised diagnosis can consume downtime without improving the door.
Compare the replacement with the approved specification: profile, size, mounting method, corners and any magnetic feature. A seal that can be physically installed is not necessarily the correct seal. Too little contact can admit air; an unsuitable profile can interfere with proper closing. Verify the part number against the door assembly, not simply the approximate opening dimensions.
Next revisit alignment, hinges, latch, closer and the lower sweep where applicable. Kolpak’s architectural specifications describe door components as distinct parts of the assembly. That distinction matters operationally: repairing flexible material does not automatically restore the performance of hardware or a threshold component.
Finally, compare the conditions before and after repair. If the new gasket was checked during a quiet dry morning but the complaint occurs during humid evening receiving, the comparison is weak. A meaningful acceptance observation covers the relevant duty pattern. The repair record should say what was verified and what environmental condition still needs evaluation.
Build a replacement request that identifies the right part
Start with the walk-in and door manufacturer’s identification, model, serial number and any separate door-system label. A retrofit door may differ from the original room manufacturer. Provide photographs of the full door, the installed seal profile and the mounting arrangement if those can be taken without disassembly. Labels are often more reliable than a room’s informal name.
Supply the measurements requested by the manufacturer or authorized parts supplier, stating how they were taken. Outside gasket dimensions, frame opening dimensions and door dimensions are not the same measurement. An order based on a single unlabeled width and height can be misunderstood. Ask the supplier to confirm the measurement basis before the part is ordered.
Describe the defect and its location, plus any closing issue. “Torn lower latch-side corner; door also catches on threshold” gives a clearer scope than “needs gasket.” If the material is intact but contact is uneven, ask for an assembly inspection rather than predetermining the replacement. Include whether an earlier seal replacement failed to resolve the condition.
A complete quotation should distinguish parts, alignment or hardware work, heater diagnosis where installed, and follow-up verification. Ask how the technician will assess the result under normal operation. This helps the operator compare proposals on the problem being solved rather than on the lowest price for a length of rubber that may not address the full cause.
Scroll sideways to view all columns.
| Information to supply | What it prevents | Who confirms it |
|---|---|---|
| Room and door-system labels | Ordering for the original room when a different door is installed | Operator supplies; service provider verifies |
| Approved part number and seal profile | Substituting a visually similar but incompatible gasket | Manufacturer or authorized supplier |
| Labeled dimensions using the requested method | Confusing opening size with gasket size | Supplier and technician |
| Photos of damage and uneven contact | Missing a separate alignment or hardware fault | Operator and inspecting technician |
| Moisture location and operating pattern | Treating every wet surface as a gasket problem | Operator documents; technician interprets |
| Post-repair acceptance observation | Calling a dry cleaned surface a completed diagnosis | Service provider and responsible manager |
Separate door problems from refrigeration-circuit problems
Warm, moist air entering through an opening can add load and affect room conditions. That does not identify the refrigerant charge or prove a circuit leak. If the room is also struggling to maintain its required conditions, arrange a complete service assessment. A technician may find a door issue, an airflow issue, a control problem, a circuit fault or several contributors.
Keep the evidence separate. A door photo documents moisture and contact. Circuit measurements, equipment identification and approved leak testing support refrigerant-side decisions. An operator should not infer low refrigerant from an icy frame, just as a technician should not ignore an obvious closing defect because a gauge reading drew attention to the condensing unit.
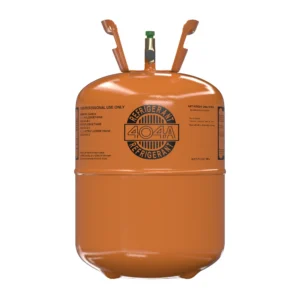
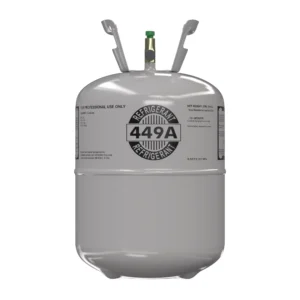
For a confirmed system requiring R404A service, the R404A product listing is a separate supply reference. For an application confirmed and approved for R449A, use the R449A product listing. These are different refrigerants, and neither is a door-gasket repair product or an interchangeable remedy for condensation.
In the United States, covered refrigerant service work requires the appropriate qualifications described by EPA Section 608. Product selection must follow the exact equipment specification, approved service plan and applicable requirements. A gasket replacement does not authorize a refrigerant conversion or establish that a cylinder should be purchased.
A focused observation log for the next service visit
Give each incident a consistent record: room identity, time, moisture location, door-closing behavior, surrounding activity and room temperature observations. Include whether the symptom followed washdown, receiving or a prolonged opening. If humidity readings are available from a suitable instrument, identify their location. Do not substitute a distant weather station for conditions immediately beside the door.
Distinguish observation from explanation. “Droplets appeared on exterior latch-side frame after evening delivery” is an observation. “Heater failed” is a hypothesis until the installed assembly is checked. Keeping those separate lets a technician consider several causes rather than arriving with a replacement part based on a premature diagnosis.
After service, repeat observations under comparable conditions and retain the repair scope. Note the approved gasket part if replaced, hardware adjustments performed by the technician and any environmental recommendation. If water returns, the previous record helps target what remains rather than restarting with the assumption that the new seal must be defective.
Fold the confirmed checks into routine care using our walk-in cooler preventive maintenance checklist. Routine inspection should identify changes early, while this focused diagnosis explains what a particular moisture pattern means. A maintenance checklist and a fault-specific service record serve different purposes and work best together.
Frequently asked questions
Does condensation around a walk-in door mean the gasket is bad?
It can, especially where damage or poor contact is visible, but humidity, alignment, door traffic and an installed frame heater can also contribute. Locate the first wet surface and inspect the complete closing assembly. A sound-looking gasket does not rule out a contact gap, and visible water alone does not establish which component needs replacing.
Why is the bottom of the door icy?
Investigate the lower sealing assembly, door position, moisture running down from above and the actual cooler or freezer design. Some systems include threshold heating; others differ. Ice that interferes with closing or creates a floor hazard requires prompt service and safe access management. Avoid chipping or heating the assembly with improvised tools.
Can I fix the problem by increasing frame-heater output?
Do not make an unapproved electrical change. First confirm that a heater is installed and assess its specified operation, controls and surrounding conditions. Humidity or assembly faults can remain even with heat present. A qualified technician should diagnose the system and use approved components while preserving the designed electrical protection.
Why does a replacement gasket still leave condensation?
The seal may be the wrong profile, incorrectly seated or unable to contact a misaligned frame. A separate hardware, heater, glazing or humidity issue may also remain. Compare the approved part and installed contact, then revisit the original moisture pattern. Another identical replacement without a new diagnosis may repeat the same outcome.
Is fogging between glass panes a gasket-cleaning problem?
Persistent moisture between panes points toward the glazing assembly rather than ordinary exposed-surface condensation. Identify the door system and arrange appropriate inspection. Cleaning an accessible perimeter gasket cannot reach or repair an internal glazing condition. Avoid drilling, dismantling or applying heat to the glass as an improvised remedy.
Does an icy door prove the system is low on refrigerant?
No. It documents a surface moisture and temperature condition, not charge quantity. Refrigerant-side diagnosis requires equipment identification and suitable professional measurements. Address the door and environmental evidence directly, and assess refrigeration performance separately if the room is not maintaining its required conditions.
What should I send a contractor before the visit?
Send equipment and door labels, wide and close photographs, the first wet location, closing symptoms and a short timing log. Mention previous gasket replacements and nearby humidity-producing activity. Ask the contractor to evaluate the assembly and environment rather than assuming a seal-only repair. Clear evidence helps select the right technician and parts.
How do I know the repair worked?
Confirm the specified contact and closing behavior, then observe the door during a comparable operating period. Keep floor-safety and storage-temperature checks active. A freshly wiped dry frame is not a sufficient acceptance result. Document which defect was repaired and whether the relevant moisture pattern returned under the conditions that originally produced it.
Manufacturer references and scope
For a multi-site operation, avoid grouping all doorway moisture complaints under one maintenance code that automatically orders a gasket. Use a brief location and symptom description, then let the service findings determine the repair category. This preserves the difference between a damaged seal, a hardware defect and an environmental problem. It also makes repeat complaints easier to identify without implying that all doors share the same design.
When reviewing a completed service ticket, check whether it answers the original question. A ticket listing “gasket installed” proves that a part was fitted; it does not explain why the frame was wet or show that the door now contacts evenly. Request the technician’s findings and acceptance observations as part of the authorized repair documentation. If conditions could not be reproduced during the visit, record that limitation and arrange an appropriate follow-up rather than treating absence of visible water at one moment as conclusive.
The linked Norlake manual, Hussmann EcoVision revision J manual and Kolpak architectural specifications describe different door designs; none is a universal repair procedure. The American Walk-in Coolers installation manual, version V2403.3 is another manufacturer reference for its covered assemblies. Match the installed model to its own current instructions before selecting parts or planning service.
These primary documents were checked for this October 2026 draft. Their document versions are identified because older publication dates do not make a manual applicable to a different door. The operator’s useful contribution is accurate observation and safe routine care. The service provider’s contribution is a verified diagnosis, an approved repair and evidence that the actual operating problem has been resolved.